

Painting the Motion Sensor 360 - KNX
In our previous blog we explained how to go about painting our Motion Sensor 360 range to make it even more discreet. Since publishing that blog we have released the KNX variety of our Motion Sensor 360, and as such there are a few we would like to detail for anyone that is planning to paint the Motion Sensor 360 - KNX.
*Update - For our most discreet, paintable sensor please see our Motion Sensor 360 - Plaster In - KNX
Selecting the paint
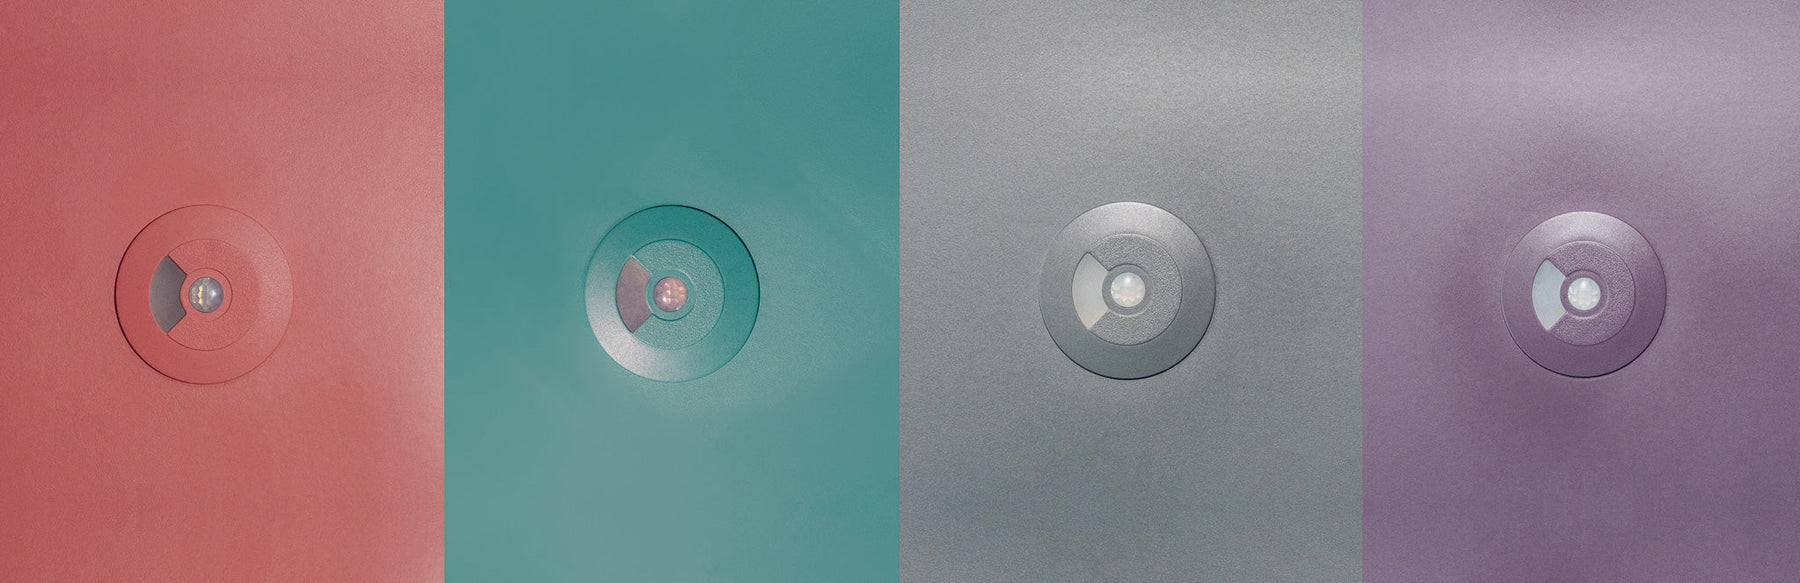
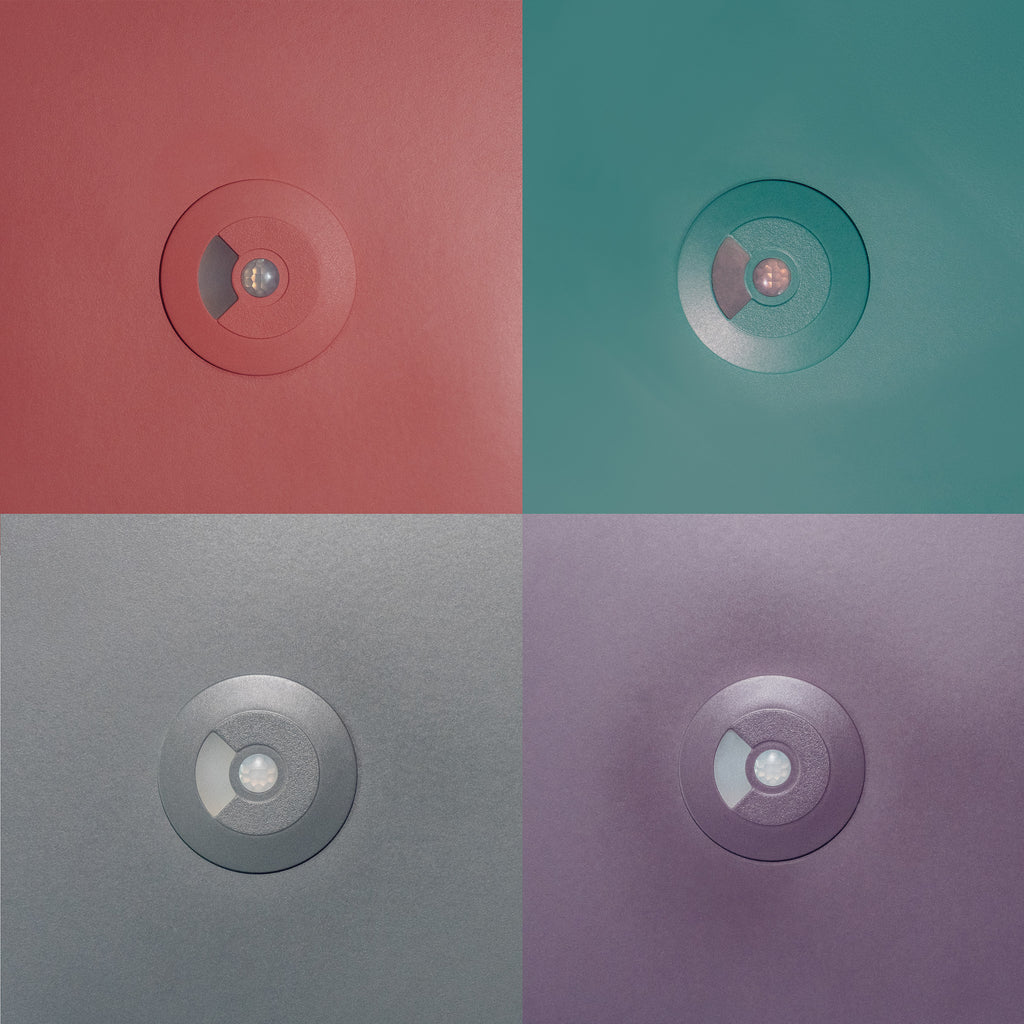
The Motion Sensor 360 - KNX uses the same plastic as other sensors in our Motion Sensor 360 range and as such the paint advised on the previous blog stand true. As a reminder; we advise using solvent-based paint because the water-based ones won't do the trick. There are plenty of paint options out there that work well, but we've found that Plastikote Matt is perfect for our ABS sensor casing.
We provide a detailed explanation for colour selection in the previous blog, so jump back to the previous article for more about colour selection.
Painting the sensor
When it comes to painting the sensor, there are a few extra steps required for the Motion Sensor 360 - KNX. Firstly, to remove the electronics from the plastics, first we must remove the Wago KNX connector from the pins.
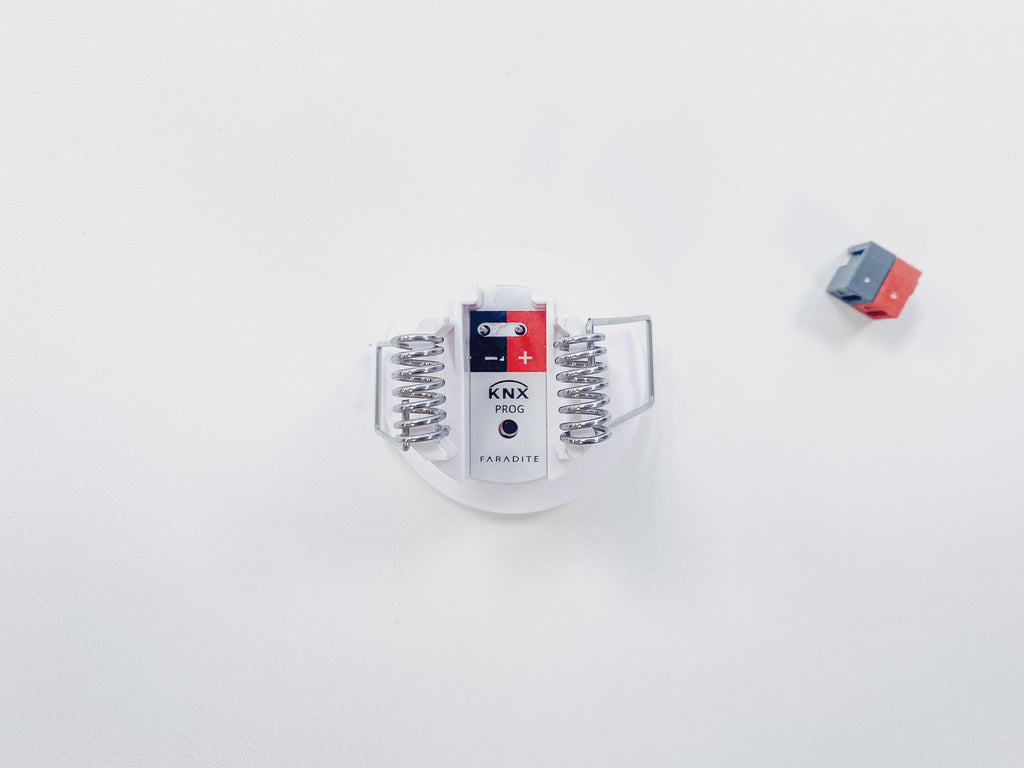
The screws holding the sensor housing together are found under the sticker, so using a flat head screwdriver, carefully prize the sticker off. Place the sticker to the side carefully, and place it upside down so the sticker remains tacky and can be reapplied at the end of the painting.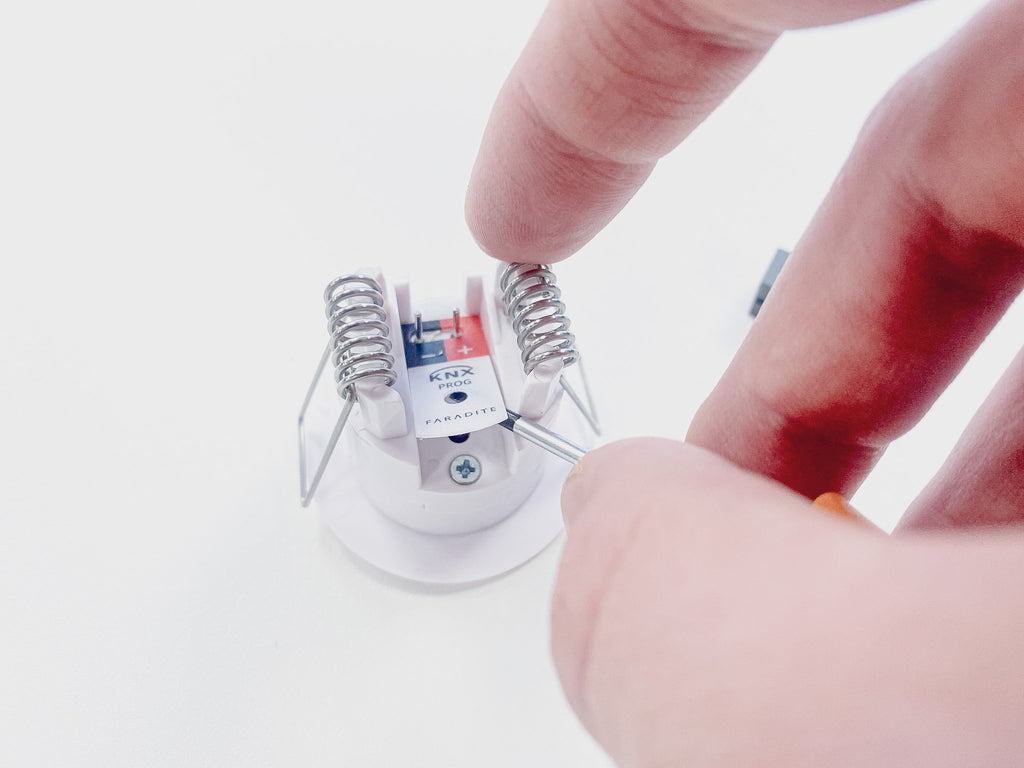
Loosen both screws and separate the housing and carefully remove the electronics, place them to one side and ensure paint does not get onto this.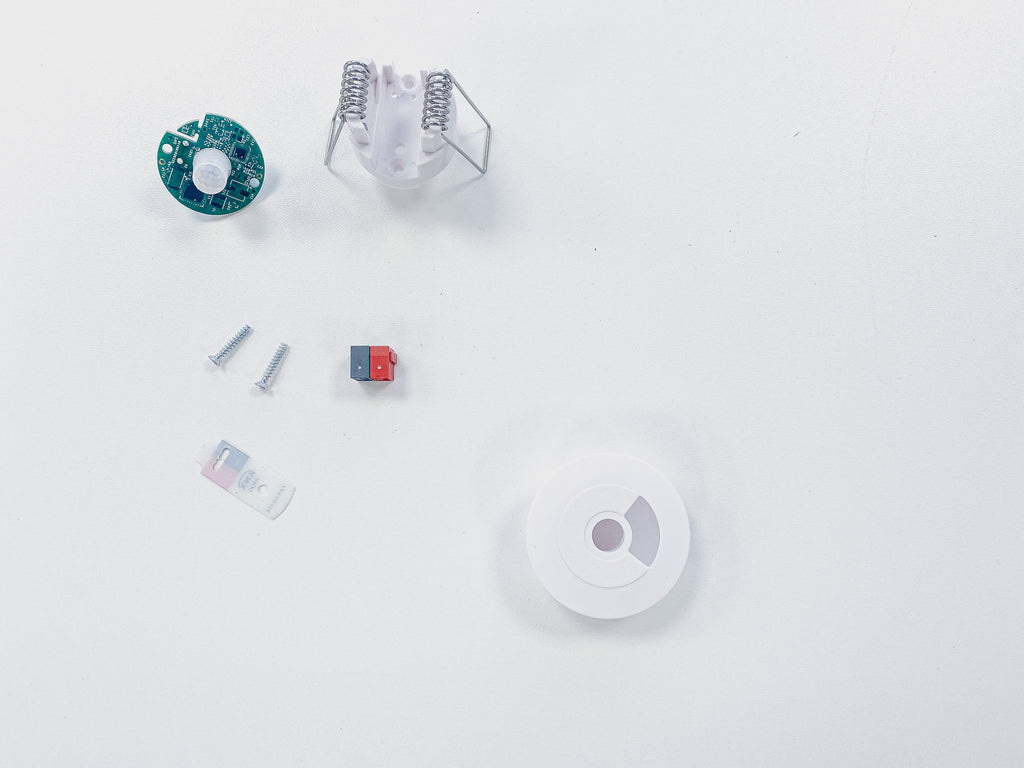
As before we need to push the curved light window out of the front part of the sensor. On our Motion Sensor 360 - KNX this is a semi transparent plastic that is essential as the sensor features a powerful brightness sensor that is located directly underneath this semi-transparent window detail. Be sure to put this light window well out the way (with the electronics we have previously removed) and do not paint these.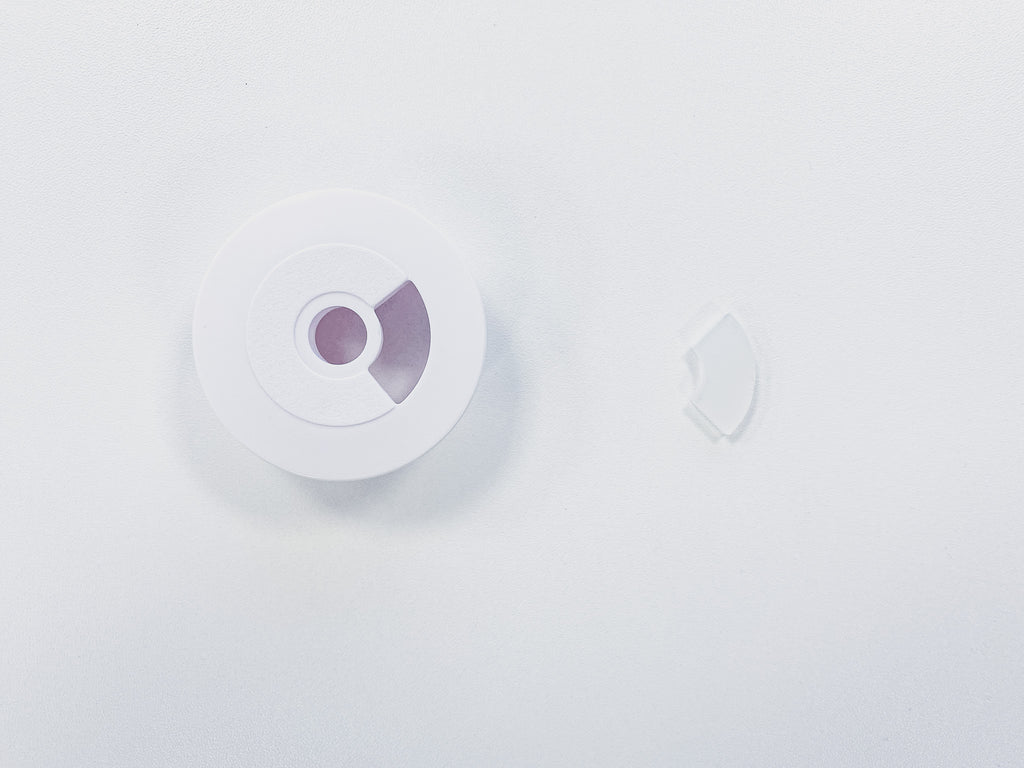
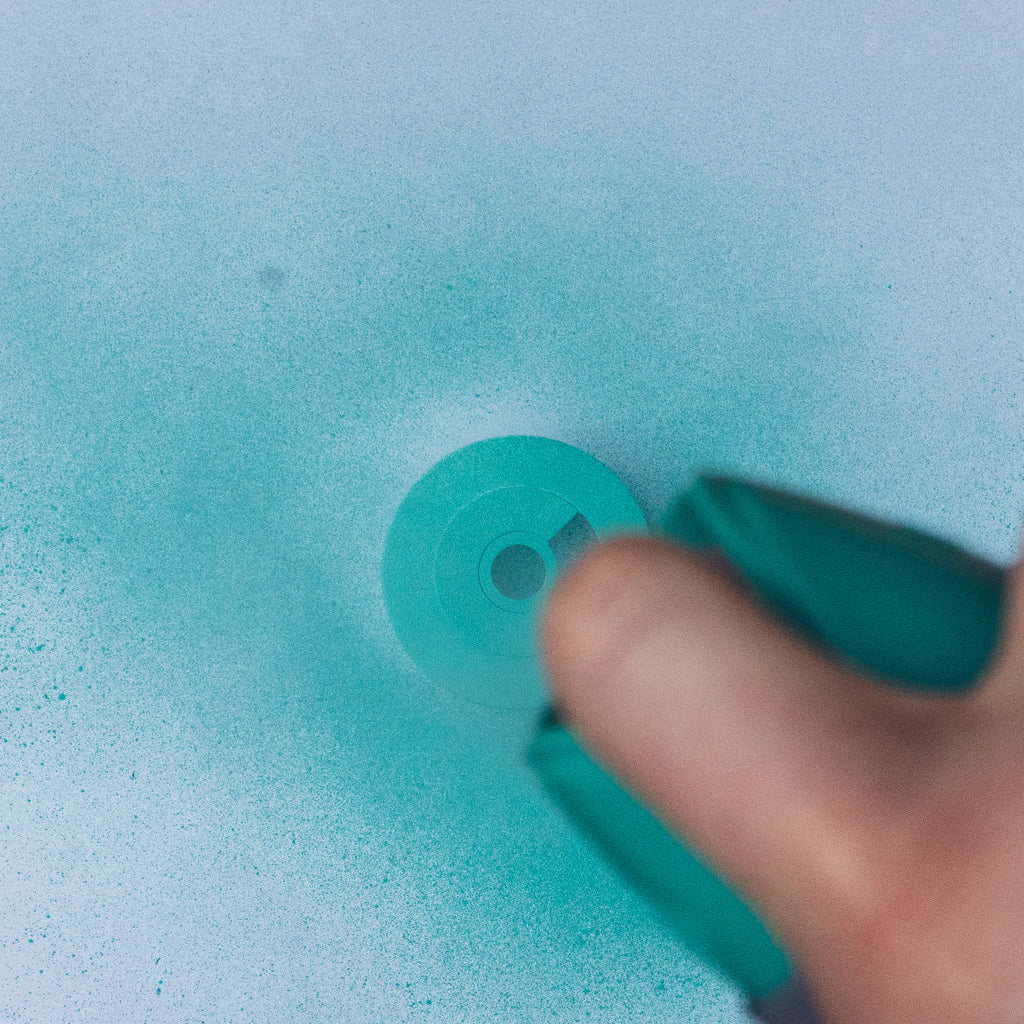
Apply paint, carefully, adding layers of spray paint over time.
Reassembling the sensor
Once painted, the sensor can be put back together by inserting the light window back into the front plastic, inserting the electronics, screwing the back plastic together and re applying the KNX sticker. The KNX Wago connector can be re connected and your device is ready to go.
In ETS you will see a parameter to select whether the sensor is white or black. This is because the light sensor reads the lux with a slight difference when installed in a black sensor compared to a white sensor. Obviously your newly painted sensor colour will not appear in ETS so leave the selection set to ‘white’.

There we have it, how to make our already extremely discreet Motion Sensor 360 - KNX even more discreet!
Any questions please reach out to the Faradite team today.
*Please note - we cannot accept returns of products that have been painted and painting sensors may void warranty.