


Faradite KNX & Loxone integration guide
In this blog we will explain how to bring our KNX motion sensors into the Loxone eco system as a simple input and harness the power of both to create powerful automation options. This solution essentially takes the brain and configuration capabilities of the Loxone Miniserver and opens it up to the wiring flexibility of KNX and allows our range of tiny, discreet KNX motion sensors to be used to reduce the impact of large ceiling mounted hardware.
This blog is not an introduction to ETS and assumes a basic level of KNX understanding. Likewise, this blog will not go into the basics of Loxone config and assumes some working knowledge of the Loxone software. What this blog aims to do is demystify the way KNX devices can be used as a simple input inside Loxone config.
It should be noted that you can also use Loxone as a GUI for a full KNX system, but in this blog we are simply using KNX devices programmed in a simple way as input devices to control logic inside the Loxone Miniserver.
Firstly, the hardware required to complete this demo:
3 x Faradite Motion Sensor 360 - KNX
Loxone Miniserver
Loxone KNX extension
KNX cable
KNX power supply
Connecting the sensors
The sensors on this example will need to be installed adhering to KNX wiring requirements. You can learn more about how to wire for KNX from your local KNX partner but essentially the KNX cable is used to create a bus looping between all KNX devices (including the Loxone KNX extension and the KNX power supply). The Faradite Motion Sensor 360 - KNX takes its power from the KNX bus so no supplementary power KNX power supply is required.
Programming the KNX devices - Physical addresses
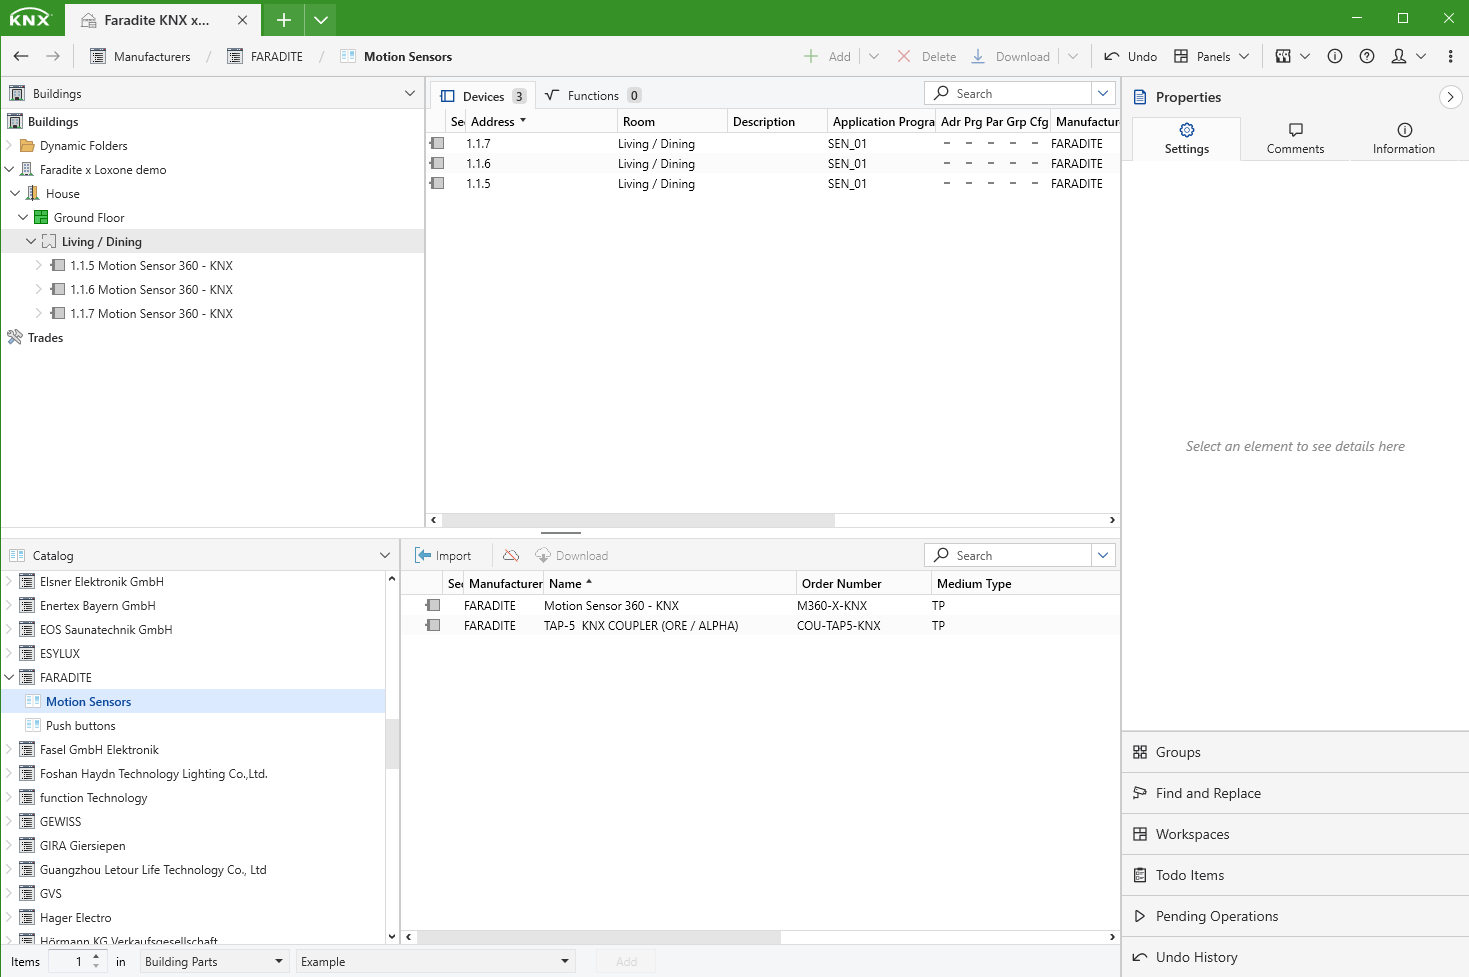
The first step when creating a KNX installation is to provide each device with an individual address. This is the address of the device and must be unique. The individual address will be 3 numbers separated by a ‘.’ In this example we will give the three KNX sensors the individual addresses of 1.1.5, 1.1.6 and 1.1.7. When initially downloading the individual address into the motion sensors we must press the programming button on the sensor we are addressing, so the software can find the hardware and assign the address. Once all sensors are addressed we can now create the group addresses.
Group addresses
A KNX group address is typically where we group a sensor, keypad or other input, with a KNX actuator output or other gateway device, but as the Loxone Miniserver will be taking care of all logic and output controls, in this solution we will simply add 2 group addresses for each motion sensor. One will be linked to the sensor's motion sensor output (Group Object 34 - Switching Output), and the second will be linked the motion sensor's LUX reading (Group Object 3 - Brightness level output). We will create the group addresses 0/0/1 and 0/0/2 for sensor 1.1.5. We will use 0/0/3 and 0/0/4 for sensor 1.1.6 and we will use 0/0/5 and 0/06 for sensor 1.1.7. A total of 6 group addresses are created.
Setting KNX device parameters in ETS
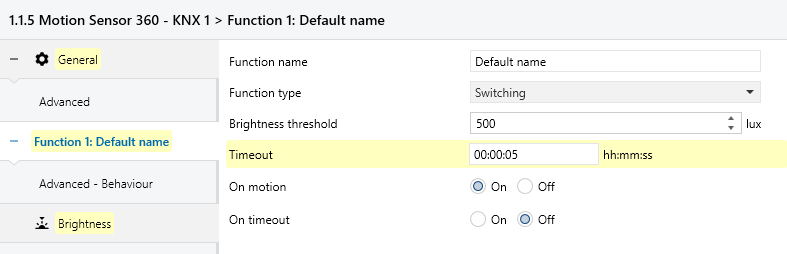
As there are a number of powerful device parameters, we need to make sure we hav set these to be sensible for the intended integration for Loxone. We will first set the motion sensor timeout in ETS to 5 seconds (Loxone config will handle the actual light scene timeouts). We also must disable the brightness threshold parameters and ensure we have the brightness value sending parameter set to ‘Cyclical and change of value’. This will ensure the brightness value is reliability sent out on the relevant group addresses.
Motion parameters:
Brightness Parameters:


Once we have added the 2 group addresses for each sensor, and linked each group address with the correct group object (one for motion and one for LUX value) and set the parameters above we ‘download’ this to the KNX system. Now each device has a group address to send it’s Lux reading and motion sensor status to. Let's get these group addresses created inside Loxone config.
Loxone config
Inside Loxone config, we have our Miniserver and the KNX extension added on the Loxone link. Under the KNX extension inside Loxone config, we will see a sub branch for ‘Actuators’ and ‘Sensors’. In this example we are just using KNX motion sensors. We click on ‘Add KNX/EIB Sensor’ and select the ‘KNX/EIB Sensor’. Do this twice, creating 2 KNX sensors in the periphery tree.
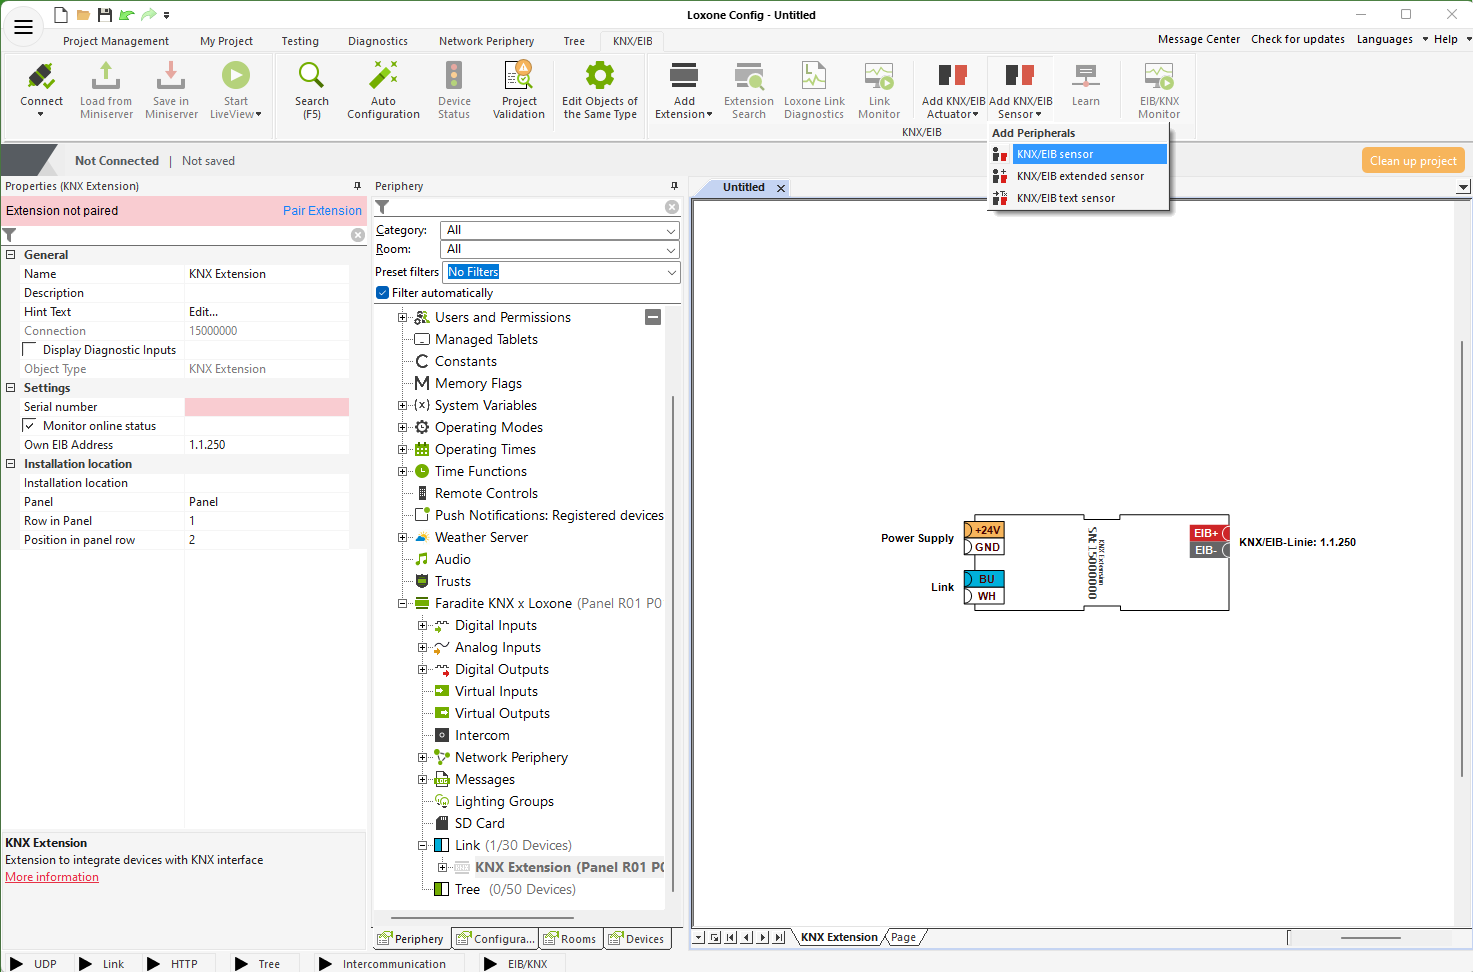
We can now find ‘Sensor 1’ and ‘Sensor 2’ in the Periphery tree underneath the KNX extension, sensors branch. After clicking on this new sensor, the left hand pane in Loxone config allows us to configure the selected group address.
We can name the device, we’ll use ‘Faradite sensor 1 - Motion’ to start. The essential part of this step is the ‘EIB address’ parameter. Here, we must input the group address that is relevant. So for the first sensor we will add motion group address, and the second we will use the LUX value group address.
We will type in 0/0/1 for the motion sensor group address. Next we will select ‘Sensor 2’ in the KNX extension’s sensor periphery tree branch and rename it ‘Faradite motion sensor 1 - LUX’. We will then input the group address 0/02 as configured in ETS.

The final essential part of this configuration is to set the correct datapoint ‘Type’ that the KNX extension is expecting said group address; this enables the Loxone Miniserver to interpret the data correctly. We can find this by looking in ETS at the group address info pane. For the motion group address we will select the “Switch-Push Button EIS1 (DPT1). As the LUX value group addresses are reporting an analogue LUX value, for each sensors LUX group address we will select the data ‘Type’ “Sensor analogue value EIS 5 (DPT9)
Motion Datapoint type:

LUX Datapoint Type:

From here, we can drag the KNX/EIB group addresses on to the Loxone config pages and use them as we would any standard digital input or analogue input inside Loxone.
The final stage is to connect the relevant KNX/EIB input to the motion sensor input of the Loxone lighting controller block and the other (the LUX value) to the lighting controller brightness value input. We can now commission the Loxone system as we would using any digital input / analogue value inside Loxone config.

Summary
This solution avoids multiple layers of intelligence and uses the KNX hardware and the KNX infrastructure to report values over the KNX bus, to the Loxone Miniserver. These values are then used inside the Loxone Miniserver as standard. The Miniserver is the smart device that is in charge, and integrators have the power of Loxone config at their disposal.
Go forth and create automation but with a full arsenal of KNX devices at your command.